If you’re the lucky owner of a new TurtleBot4 Lite from ClearPath Robotics and Open Robotics, then you’ve probably started to explore a bunch of the available features. One notable difference between the TurtleBot4 Standard Edition and TurtleBot4 Lite edition is that the Standard version comes with a pre-configured Bluetooth controller for navigating the robot.
It’s actually pretty easy to bind a 3rd party Bluetooth Joystick to the Lite robot as well, but some of the information provided in the official documentation isn’t quite complete. We recently went through this process and decided to document it here in case other folks decide to do this as well.
Hardware
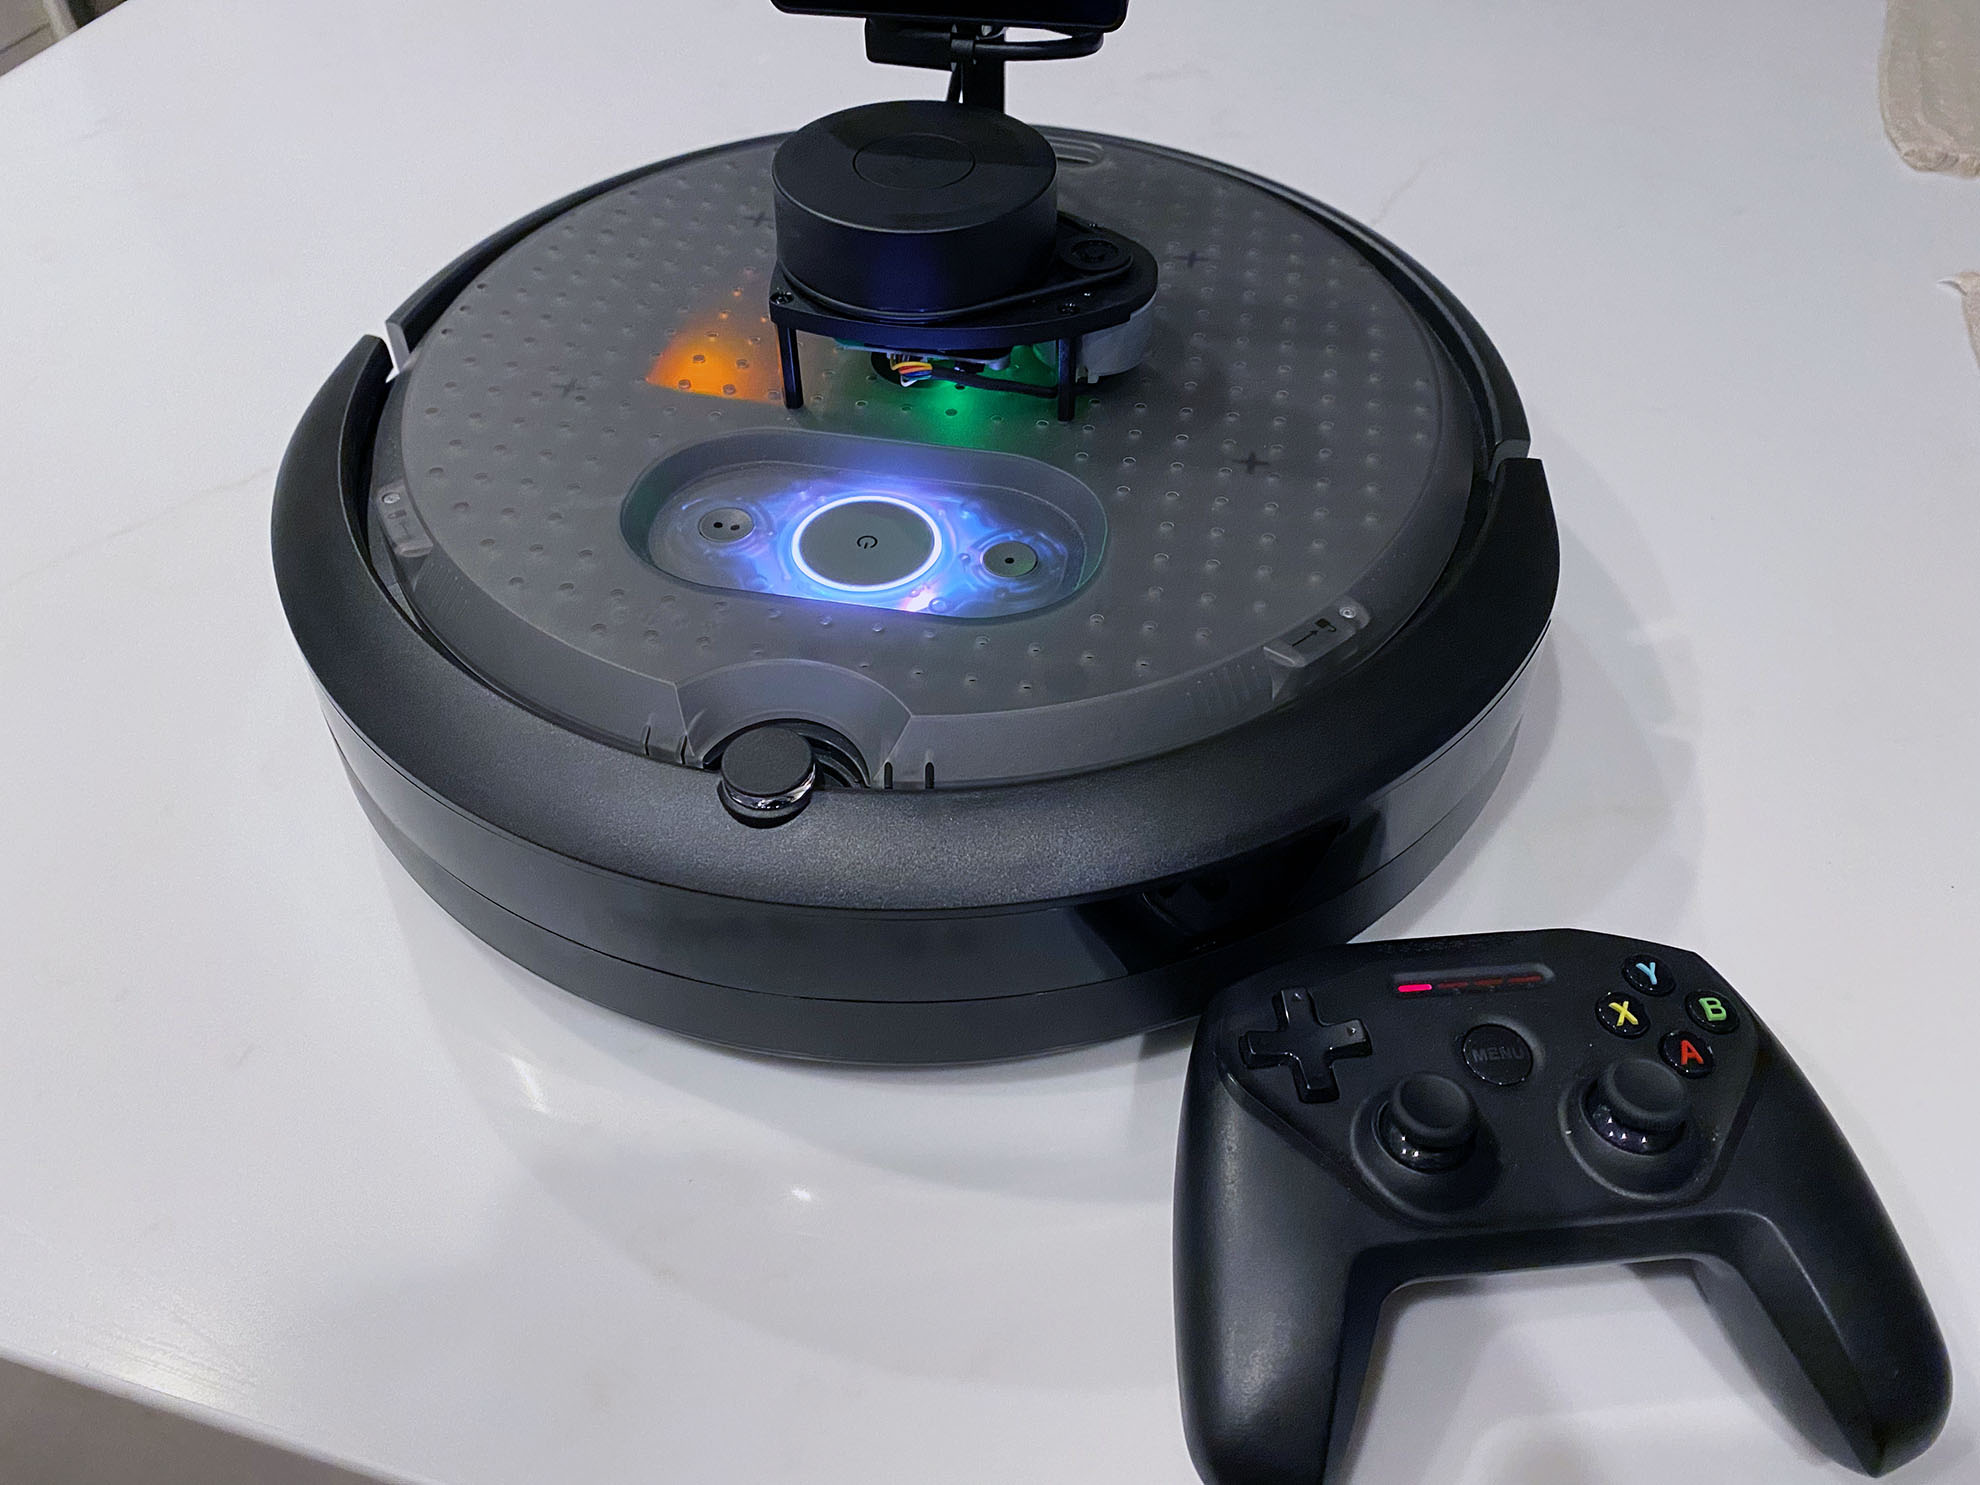
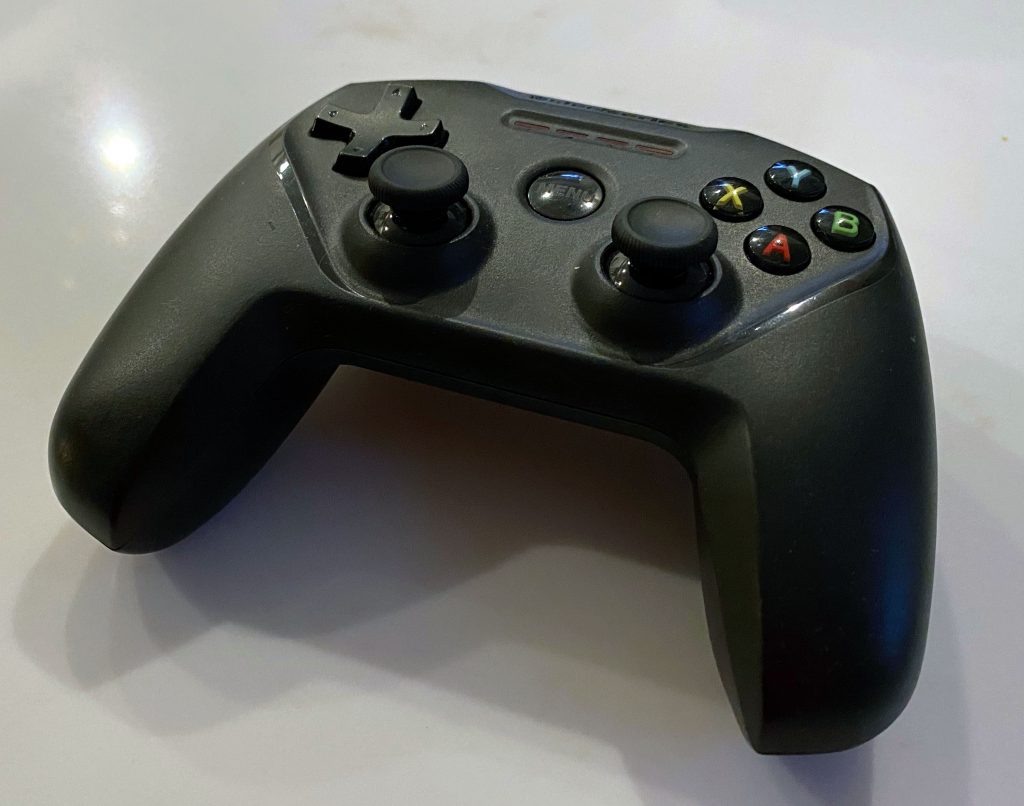
In our case, we’re using the TurtleBot4 Lite from ClearPath Robotics (which you likely already have if you’re here reading this article) and a SteelSeries Nimbus Controller which we had on hand – originally purchased at an Apple Store for playing iPad/AppleTV games.
Other generic Bluetooth Joysticks should probably work fine as well, but your mileage may vary a bit with some of the nuances of your specific controller. If in doubt, it’s worth giving it a shot to bind and try out your controller. Most of the axis/button controls are configurable, so even if your controller is a slightly different layout, or has different conventions for the inputs, you should be able to adjust the configuration to work for your device.
Enable Bluetooth on TurtleBot4 Lite and Quick Test of Joystick
By default, Bluetooth is not enabled on the TurtleBot4 Lite Edition. The documentation provided by ClearPath shows you how to get this set up on the Raspberry Pi 4 inside the TurtleBot, but there’s a bit more to the story, which we’ll return to in a moment.
To get started though, your baseline is to follow these instructions in the ClearPath documentation for the TurtleBot4 to get things running. Instructions can be found here: https://turtlebot.github.io/turtlebot4-user-manual/tutorials/driving.html#joystick-teleoperation
To summarize though, you perform the following steps:
- SSH Into the TurtleBot4
- Run ‘
sudo bluetooth.sh'to enable bluetooth - Perform the Controller Setup sequence as described in the docs here: https://turtlebot.github.io/turtlebot4-user-manual/overview/quick_start.html#turtlebot-4-controller-setup
Once you’ve done that, you should be able to go back and manually launch the joy_telop node in the shell on the Pi and get control of your robot with the controller:ros2 launch turtlebot4_bringup joy_teleop.launch.py
In my case, I found that the Y-axis on the control was inverted compared with how I expected to drive the robot, but otherwise everything was working as advertised between my controller and robot. I fixed that by inverting that axis in the controller configuration file, which we discuss down below.
Summary and Next Steps
So, at this point you should have joystick control of your robot, even if imperfect. If not, you need to go back and troubleshoot the steps above because they are the foundation of what happens next.
Also, if you’re happy enough to manually launch your joystick control from the shell each time you want to control your robot that way, you can also just stop here and manually run the joy_telop node when you want to use your joystick.
However, If you want joystick control to automatically be enabled at robot launch time, the documentation is actually slightly incorrect where it states:
Once your controller is connected, make sure that the joy_teleop nodes are running. These are launched as part of the Standard and Lite launch files under turtlebot4_bringup.
In reality, joy_telop is not actually launched as part of the Lite launch file, so we set out to remedy that below.
What is the Difference Between the TurtleBot4 Standard Edition and TurtleBot4 Lite Edition Launch Files?
Conceptually, the task ahead of us is to figure out what the difference is and why the Standard Edition Launch Files bring up the joy_telop node and why the Lite Edition Launch Files do not.
The answer to this is pretty straightforward – the lite files omit launching the node. To see this, we look at the launch files in GitHub for the turtlebot4_robot package. You can find those files here: https://github.com/turtlebot/turtlebot4_robot/tree/galactic/turtlebot4_bringup/launch
The generate_launch_description() function in standard_launch.py contains the calls to automatically launch the joy_telop node. We should be able to add these to the lite_launch.py file and get the node launched as well on boot.
So, it’s straight-forward enough to see how we might edit our file, but this opens up a couple other questions:
- What’s the best way to override this launch file? If you’re like me, you got the TurtleBot4 out of the box and fired it up as opposed to building it from source or anything like that. So, this involves some messing with the ROS goings-on under the hood.
- How can we adjust the Joystick configuration at the same time? As it turns out, the sibling folder to the
turtlebot4_robot/turtlebot4_bringup/launchfolder is theturtlebot4_robot/turtlebot4_bringup/configfolder which just so happens to contain theturtlebot4_controller_config.yamlfile that we need to modify in the case where we need to adjust any buttons or axes for differences between our controller and the baseline.
Potential Approaches to Adding Joystick Control to TurtleBot4 Lite Launch Files
- Hack and Slash – Edit the package files directly
- Load an Alternate Launch File at Boot
- Compile from Source / Create a ROS Overlay
- (Probably others, but not ROSsy-enough to know what they are)
Hack and Slash
There’s nothing really preventing us from going and just editing those files directly on the TurtleBot. This could potentially cause some grief downstream if those packages got updated in subsequent revisions and our changes were overwritten.
But, really, since we know what they were, it wouldn’t be catastrophic. If you’re in a hurry and not super concerned about downstream effects, you might choose to go this path for expedience. Just follow the steps below on the original files in the ROS install for the TurtleBot, and you can short circuit the process.
I decided against “hack and slash” because I think there’s more to be learned here about how ROS works and doing things the correct way, but you do you.
Load an Alternate Launch File at Boot
So, another thought was that we could go create a new alternative version of the launch file (something like lite_launch_plus_joy.py and add in the nodes we would like to enable the joystick.
This would work fine, and be relatively easy to implement. We did a deep dive into how the “Robot Upstart” process works and how the launch file is used by the turtlebot4 Linux Service in a previous blog post. You could follow that approach and set up a new launch file to load and run the existing nodes, plus the joy_telop service.
The main concern with this approach is that it wouldn’t solve the configuration issue we’ve got with our SteelSeries Nimbus (the Y-axis on the controller is inverted for us) and we’d like to have the flexibility to change that, and anything else that’s going to come up in the future. So, it really feels like the launch file solution isn’t ideal. However, if you’re happy with the way the default controller configuration is working for your controller, you can probably just create a new launch file and roll with that solution.
Create a ROS Overlay and Compile the turtlebot4_robot Ourselves to Override the Base Implementation
This option feels like they are the most correct from a ROS philosophy perspective. The other nice side effect of setting up an overlay is that it also set us up to being able to modify the TurtleBot and create our own code and extensions to the platform in the future. So, for this reason, I chose to see this path through.
This option still forces us to modify how the turtlebot4 ROS service is launched on the robot. But, it feels like time well spent to figure out how to do things right.
What is a ROS Overlay?
Overlays involve creating a workspace where we can source and modify existing ROS packages to overlay (or basically “override” the existing install underneath). We can also add our own packages in the future into the overlay to add new functionality to our TurtleBot. The “underlay” in this case is the base ROS implementation for the TurtleBot installed as packages. Anything that we don’t override will fall through to the base implementation.
However, there are also some nuances with creating the overlay in terms of how to get the Linux environment and automatic launch of our TurtleBot4 nodes to recognize the presence of our overlay, and ideally to be able to switch back and forth between the overlay and vanilla TurtleBot packages if we needed to revert.
We previously documented the robot_upstart package and how the Raspberry Pi is loading ROS as a Linux service in this blog post. We can use what we learned from that process to try set up an overlay with a custom turtlebot4_robot package so that we can upgrade both the launch file and adjust the controller configuration. How bad can it be?
Creating a ROS Overlay and Adding Joystick Support to the TurtleBot4 Lite Edition
Ok. We have a plan. Let’s figure out how to execute it.
Step 1: Create a Workspace and Custom Build of the turtlebot4_robot Package
You can create a workspace anywhere you like on the robot, but the convention in most of the Turtlebot4 tutorials and code examples is to create a workspace as follows. If you haven’t already done this call the following command from the shell on the Raspberry Pi:mkdir ~/turtlebot4_ws/src -p
This will create the workspace in the home directory of the ubuntu user on the Pi.
Once that’s done, or if you already have the directory, change into it:cd ~/turtlebot4_ws/src
Step 2: Clone the turtlebot4_robot package from it’s GitHub repo
Fairly straight forward – to clone the repo, run:git clone https://github.com/turtlebot/turtlebot4_robot.git
Step 3: Install Build Dependencies
We’ll need to get all the dependencies required for the turtlebot4_robot repo to build. To do this, call:cd ~/turtlebot4_ws
rosdep install --from-path src -yi
Note – if you’ve never run rosdep before, it may ask to be initialized, but it will provide instructions for how to do this.
Once you’ve run it, you should get a message saying#All required rosdeps installed successfully
Step 4: Build the turtlebot4_robot Package
Back to the package folder:cd ~/turtlebot4_ws/src
And then run colcon to build the package:colcon build --symlink-install
The build process should run showing the packages being compiled. The Raspberry Pi isn’t exactly a speed demon on the build side, but it gets the job done after a few minutes.
Step 5: Make our Modifications
At this point, the instructions depend a bit on what you want to do. At minimum, we’re going to add the joy_telop node to our launch file, but if you also want to make changes to your controller configuration, that is totally up to you.
Launch File Changes
The launch file for the Lite Edition of the TurtleBot4 is found in the turtlebot4_bringup/launch folder of the package. To get there quickly:cd ~/turtlebot4_ws/src/turtlebot4_robot/turtlebot4_bringup/launch
You can edit the lite.launch.py script in the editor of your choice (nano lite.launch.py will work if you don’t have another editor installed).
Basically, what we’re doing is comparing the code in standard.launch.py and grabbing the lines that are responsible for launching joy_telop and pasting them in to the lite configuration.
Be careful to maintain Python indentation with your changes so that you don’t inadvertently cause problems.
We’ve added a comment below in front of all the code that has been added. Look for #Adding joy_telop based on standard.launch.py to see the changes below.
Make the changes, and save the file.
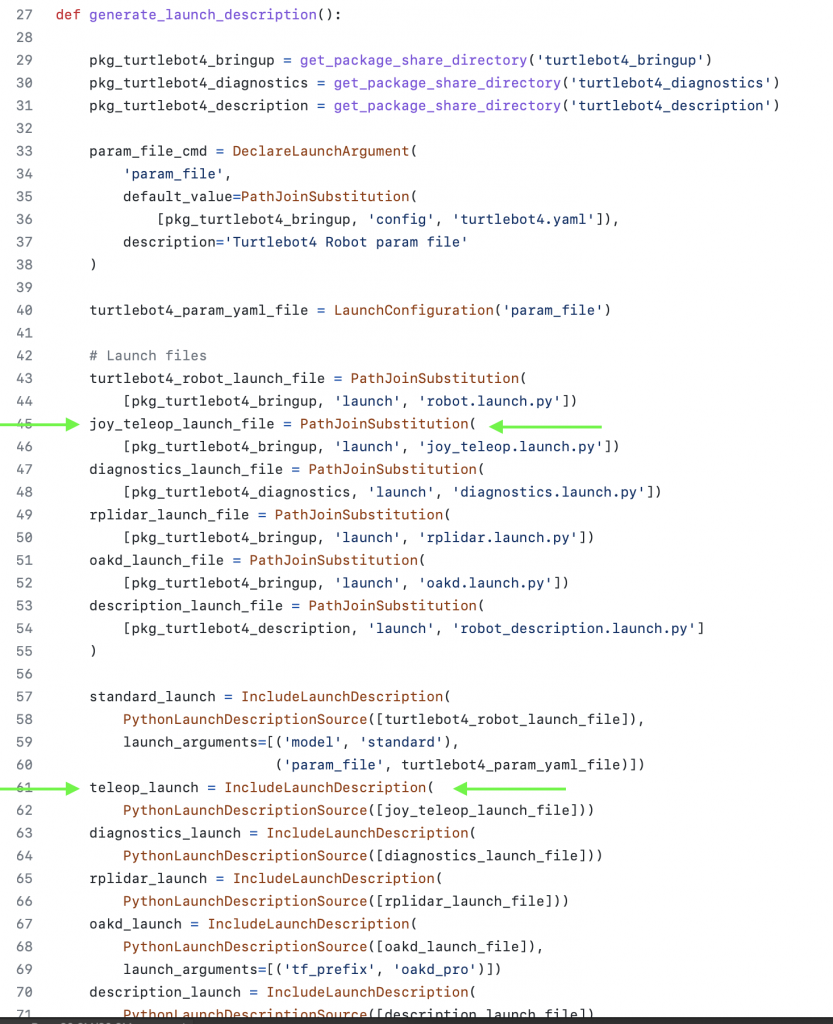
def generate_launch_description():

    pkg_turtlebot4_bringup = get_package_share_directory('turtlebot4_bringup')
    pkg_turtlebot4_diagnostics = get_package_share_directory('turtlebot4_diagnostics')
    pkg_turtlebot4_description = get_package_share_directory('turtlebot4_description')

    param_file_cmd = DeclareLaunchArgument(
        'param_file',
        default_value=PathJoinSubstitution(
            [pkg_turtlebot4_bringup, 'config', 'turtlebot4.yaml']),
        description='Turtlebot4 Robot param file'
    )

    turtlebot4_param_yaml_file = LaunchConfiguration('param_file')

    turtlebot4_robot_launch_file = PathJoinSubstitution(
        [pkg_turtlebot4_bringup, 'launch', 'robot.launch.py'])
    # Adding joy_telop based on standard.launch.py
    joy_teleop_launch_file = PathJoinSubstitution(
        [pkg_turtlebot4_bringup, 'launch', 'joy_teleop.launch.py'])
    diagnostics_launch_file = PathJoinSubstitution(
        [pkg_turtlebot4_diagnostics, 'launch', 'diagnostics.launch.py'])
    rplidar_launch_file = PathJoinSubstitution(
        [pkg_turtlebot4_bringup, 'launch', 'rplidar.launch.py'])
    oakd_launch_file = PathJoinSubstitution(
        [pkg_turtlebot4_bringup, 'launch', 'oakd.launch.py'])
    description_launch_file = PathJoinSubstitution(
        [pkg_turtlebot4_description, 'launch', 'robot_description.launch.py']
    )

    lite_launch = IncludeLaunchDescription(
        PythonLaunchDescriptionSource([turtlebot4_robot_launch_file]),
        launch_arguments=[('model', 'lite'),
                          ('param_file', turtlebot4_param_yaml_file)])
    # Adding joy_telop based on standard.launch.py
    teleop_launch = IncludeLaunchDescription(
        PythonLaunchDescriptionSource([joy_teleop_launch_file]))
    diagnostics_launch = IncludeLaunchDescription(
        PythonLaunchDescriptionSource([diagnostics_launch_file]))
    rplidar_launch = IncludeLaunchDescription(
        PythonLaunchDescriptionSource([rplidar_launch_file]))
    oakd_launch = IncludeLaunchDescription(
        PythonLaunchDescriptionSource([oakd_launch_file]),
        launch_arguments=[('tf_prefix', 'oakd_lite')])
    description_launch = IncludeLaunchDescription(
        PythonLaunchDescriptionSource([description_launch_file]),
        launch_arguments=[('model', 'lite')]
    )

    ld = LaunchDescription()
    ld.add_action(param_file_cmd)
    ld.add_action(lite_launch)
    # Adding joy_telop based on standard.launch.py
    ld.add_action(teleop_launch)
    ld.add_action(diagnostics_launch)
    ld.add_action(rplidar_launch)
    ld.add_action(oakd_launch)
    ld.add_action(description_launch)
    return ld
Joystick Configuration Changes
The controller config is specified in turtlebot4_bringup/config/turtlebot4_controller_config.yaml
The top of the file contains the documentation for how it works – edit to match your controller configuration as you see fit.
Step 6: Re-Build Package
Run the build process again
colcon build --symlink-install
Step 7: Create Workspace Launch Script
If you are running a ROS overlay from the command-line, you need to source your workspace environment setup in order to register your ROS nodes and modifications. We’re going to need to do the same thing when the Linux services start up on the device. So, we need to create a script that will first source the default Galactic environment, and then overlay our workspace on top of it.
We’re going to put this composite Workspace Launch Script into our workspace root folder. Change to that directory:cd ~/turtlebot4_ws
Create a bash script in that folder (using your text editor) named setup.bash with the following lines:
source /opt/ros/galactic/setup.bash
source /home/ubuntu/src/turtlebot4_robot/install/local_setup.bash
Step 8: Shut Down Default ROS Service and Do a Test Run
The first thing we need to do is to disable the default turtlebot4 service running on the Raspberry Pi. ClearPath provides a Python script for uninstalling the default services. To disable them, you run the uninstall script and then restart the robot (just to be safe):uninstall.py
sudo reboot now
Next, we’re going to launch our environment from the command line just to check for errors. First, we set up the environment (using the setup.bash file we created earlier):cd ~/turtlebot4_ws
source setup.bash
Now, we’re going to launch ROS using our new launch file:cd ~/turtlebot4_ws/src/turtlebot4_robot/turtlebot4_bringup/launch/
ros2 launch lite.launch.py
After a lot of debug output, the robot should come online if you’ve done everything correctly and… you should be able to drive it around with your controller based on the joystick configuration you specified.
If you need to brush up on the controls, you can check the documentation here:
https://turtlebot.github.io/turtlebot4-user-manual/tutorials/driving.html#joystick-teleoperation
When you’re done testing press CTRL-C to kill the script.
Step 9: Modify install.py to Create Our Own Linux Service for Our Overlay
Ok. Almost there! We know that our launch script works and we have an environment with our overlay supported with the default Turtlebot4 underlay.
Now, we want to install a Linux service that will automatically run our launch file boot time and create a background service based on our overlay and modifications.
ClearPath provides a script called install.py (the exact opposite script of the uninstall.py we used earlier to clean up the environment). We want to leave this script intact in case we want to go back to default environment in the future, so we’ll make a copy and modify it to run our new environment.
First, we copy the script:sudo cp /usr/local/bin/install.py /usr/local/bin/overlay-install.py
Then, we’ll modify it to use the setup.bash file we created in our overlay. Find the definition of the turtlebot4_job near the bottom of the file that looks like this:
turtlebot4_job = robot_upstart.Job(name='turtlebot4',
     rmw='rmw_cyclonedds_cpp',
     rmw_config='/etc/cyclonedds_rpi.xml',
     workspace_setup='/opt/ros/galactic/setup.bash',
     ros_domain_id=domain_id)
And, just change the value of workspace_setup to point to our new workspace setup file (/home/ubuntu/turtlebot4_ws/setup.bash), and the name of the job to turtlebot4-overlay (so that we can tell we’re running the new service)
turtlebot4_job = robot_upstart.Job(name='turtlebot4-overlay',
     rmw='rmw_cyclonedds_cpp',
     rmw_config='/etc/cyclonedds_rpi.xml',
     workspace_setup='/home/ubuntu/turtlebot4_ws/setup.bash',
     ros_domain_id=domain_id)
Save the file, and then run it to install our new service:install.py lite
Once installed, you need to refresh the services and start our new service:sudo systemctl daemon-reloadsudo systemctl start turtlebot4-overlay
Thats it! Your robot should be back online and ready for action.
Things To Remember
So, are there implications of having built our own version of the turtlebot4_robot package? Hopefully not too any, but the most important thing to realize is that you will need to manually pull any updates to the package from GitHub in the future as you are now in control of the code in your overlay.
In other words, updating the turtlebot4_robot package via 'apt update' will update the underlay, but not your version of the package.
Thankfully, it’s not difficult to do this manually. If there are changes in the GitHub repo that you’d like to pull down to your robot, just do the following:
cd ~/turtlebot4_ws/src/turtlebot4_robot
git pull
colcon build --symlink-install
This pulls the latest version from GitHub and then runs the build process again to update the code.
Happy Driving!